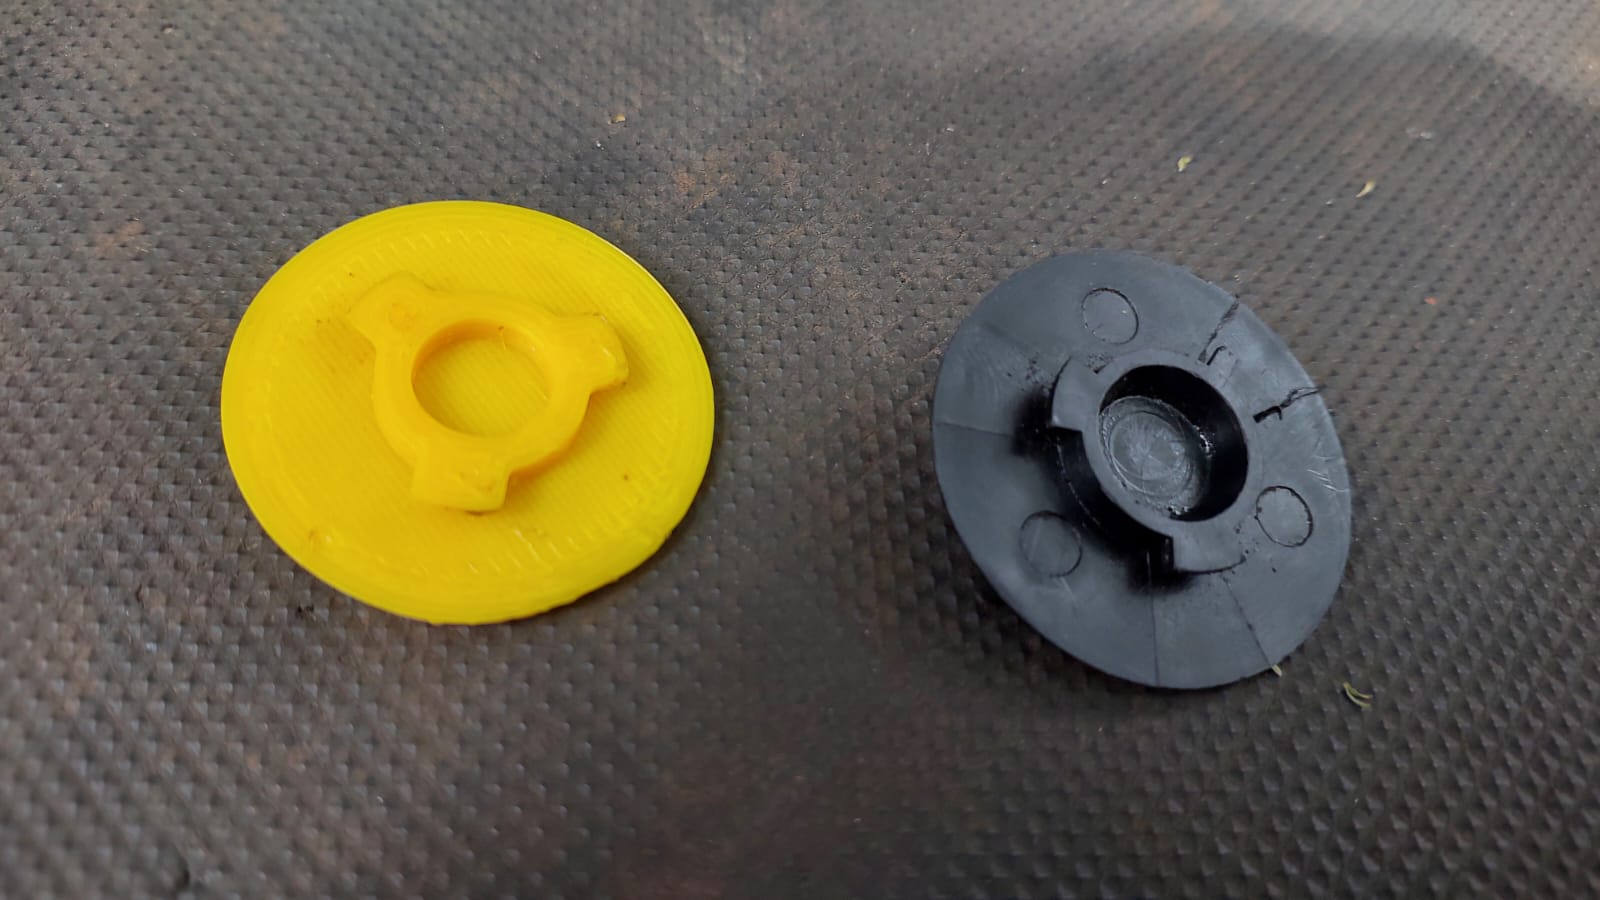
The problem: an obsolete part, not an obsolete machine
A great deal of medical equipment outlives the supply chain that supports it. The instrument on the bench is mechanically sound, calibrated, and trusted — and then a single moulded plastic component fatigues, cracks, or wears through, or a capacitor on a motherboard fails and the whole machine stops. When the manufacturer has discontinued the model, or simply no longer stocks that part, the institution is left with an expensive, functional machine and no legitimate way to bring it back.
That is the gap I work in. The part shown above is a small filter cap — a moulded retainer that seats a filter into its housing with a bayonet twist. The original (right, in black) had worn and split at the hub. It is trivial in isolation, and impossible to buy. Without it, the machine it belonged to was finished.
It did not need to be.
The service, in one sentence
Give me a similar part — worn, cracked, or intact — and I will measure it, reverse-engineer it into parametric CAD, and produce a 3D-printable replacement that fits. Every step below is reproducible, the geometry is captured as code rather than a one-off sketch, and the output is a physical part in your hand. Here is exactly how that happened for this filter cap.
Step 1 — Measure the original and capture its geometry
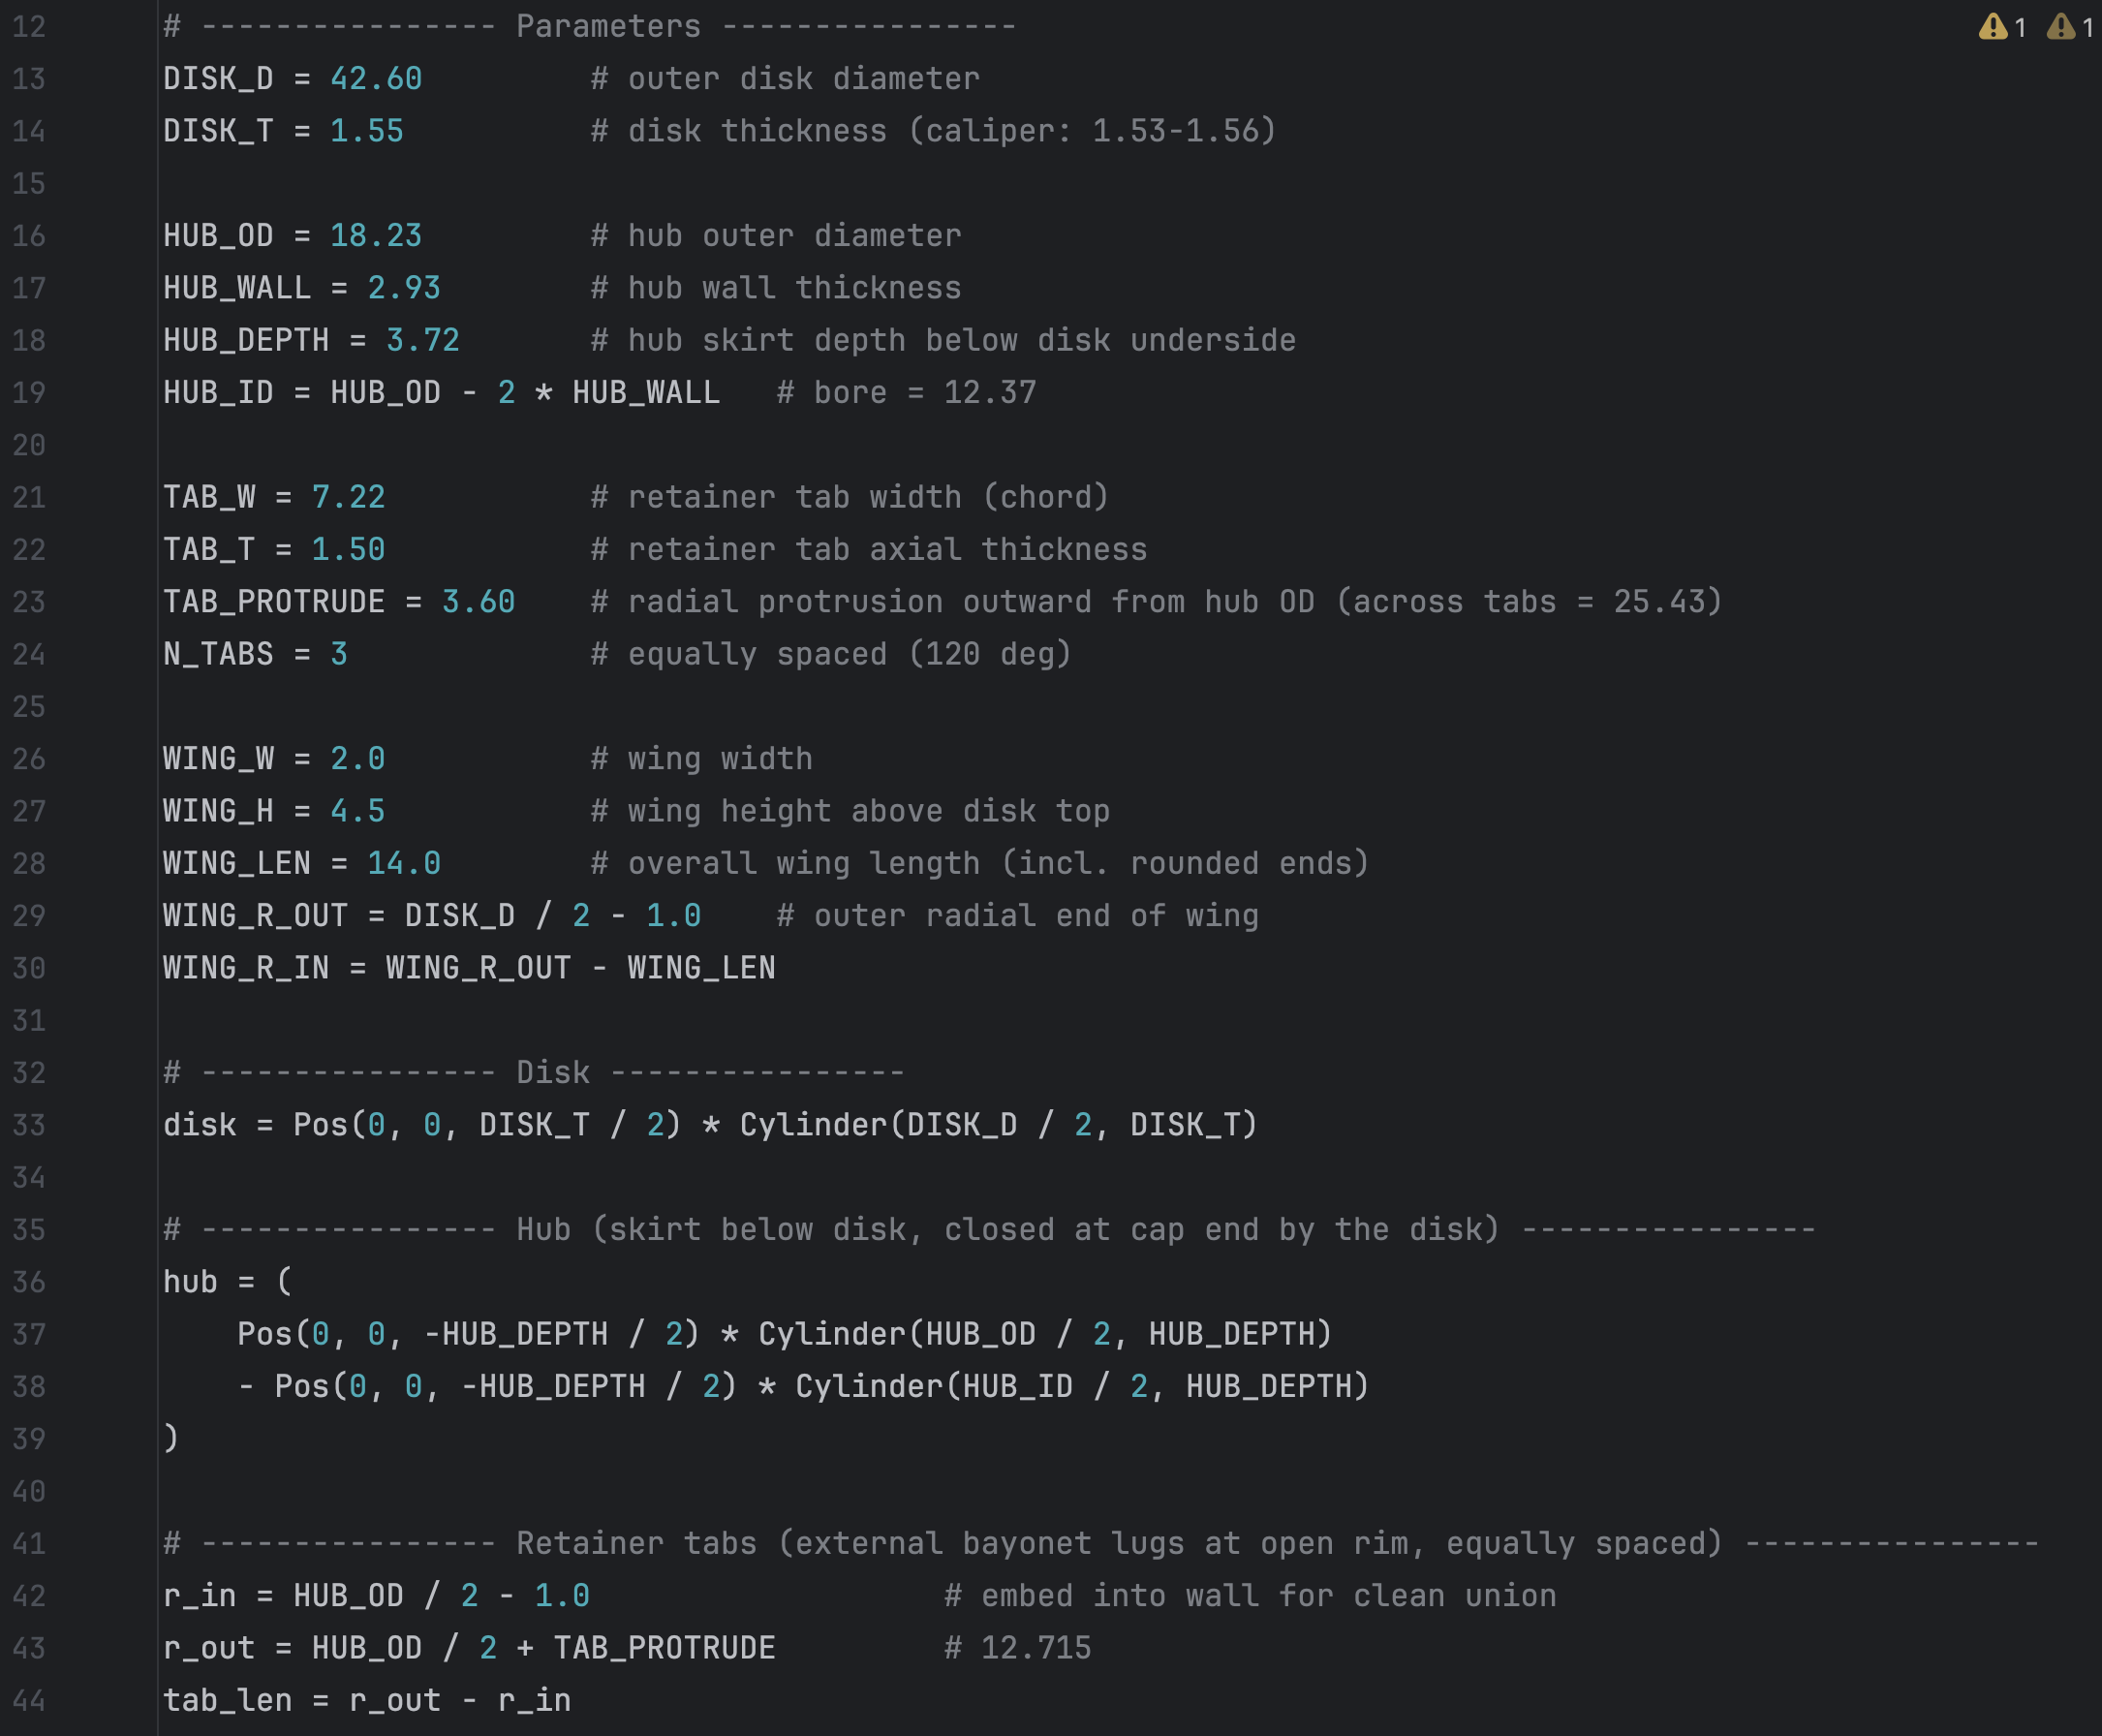
Reverse engineering begins with a careful physical survey. Using digital calipers, I take every dimension that defines how the part fits and functions: the outer disk, the depth and bore of the central hub, the size and spacing of the retaining tabs, and the height of the two locating ribs on top. Nothing is guessed — the disk thickness here, for example, was measured across several points and settled between 1.53 and 1.56 mm.
For this cap the defining measurements were:
| Feature | Dimension |
|---|---|
| Outer disk | Ø 42.60 mm × 1.55 mm thick |
| Central hub | Ø 18.23 mm outer, 12.37 mm bore, 3.72 mm skirt depth |
| Bayonet retainer tabs | 3 tabs at 120°, 7.22 mm wide, 25.43 mm across |
| Locating ribs ("wings") | 2 opposed ribs, 14 mm long × 4.5 mm tall |
Step 2 — Turn the measurements into parametric code
Rather than draw the part once, I express it as parametric CAD code — a small script in which every measured value is a named variable. This is the reusable asset: change a number and the model rebuilds, so a slightly different size, a thicker wall, or a fourth tab is a one-line edit rather than a fresh design. The complete code for this part lives alongside this post (filter_cap.py), written with the open-source build123d library.
Step 3 — Build it in FreeCAD and export an STL
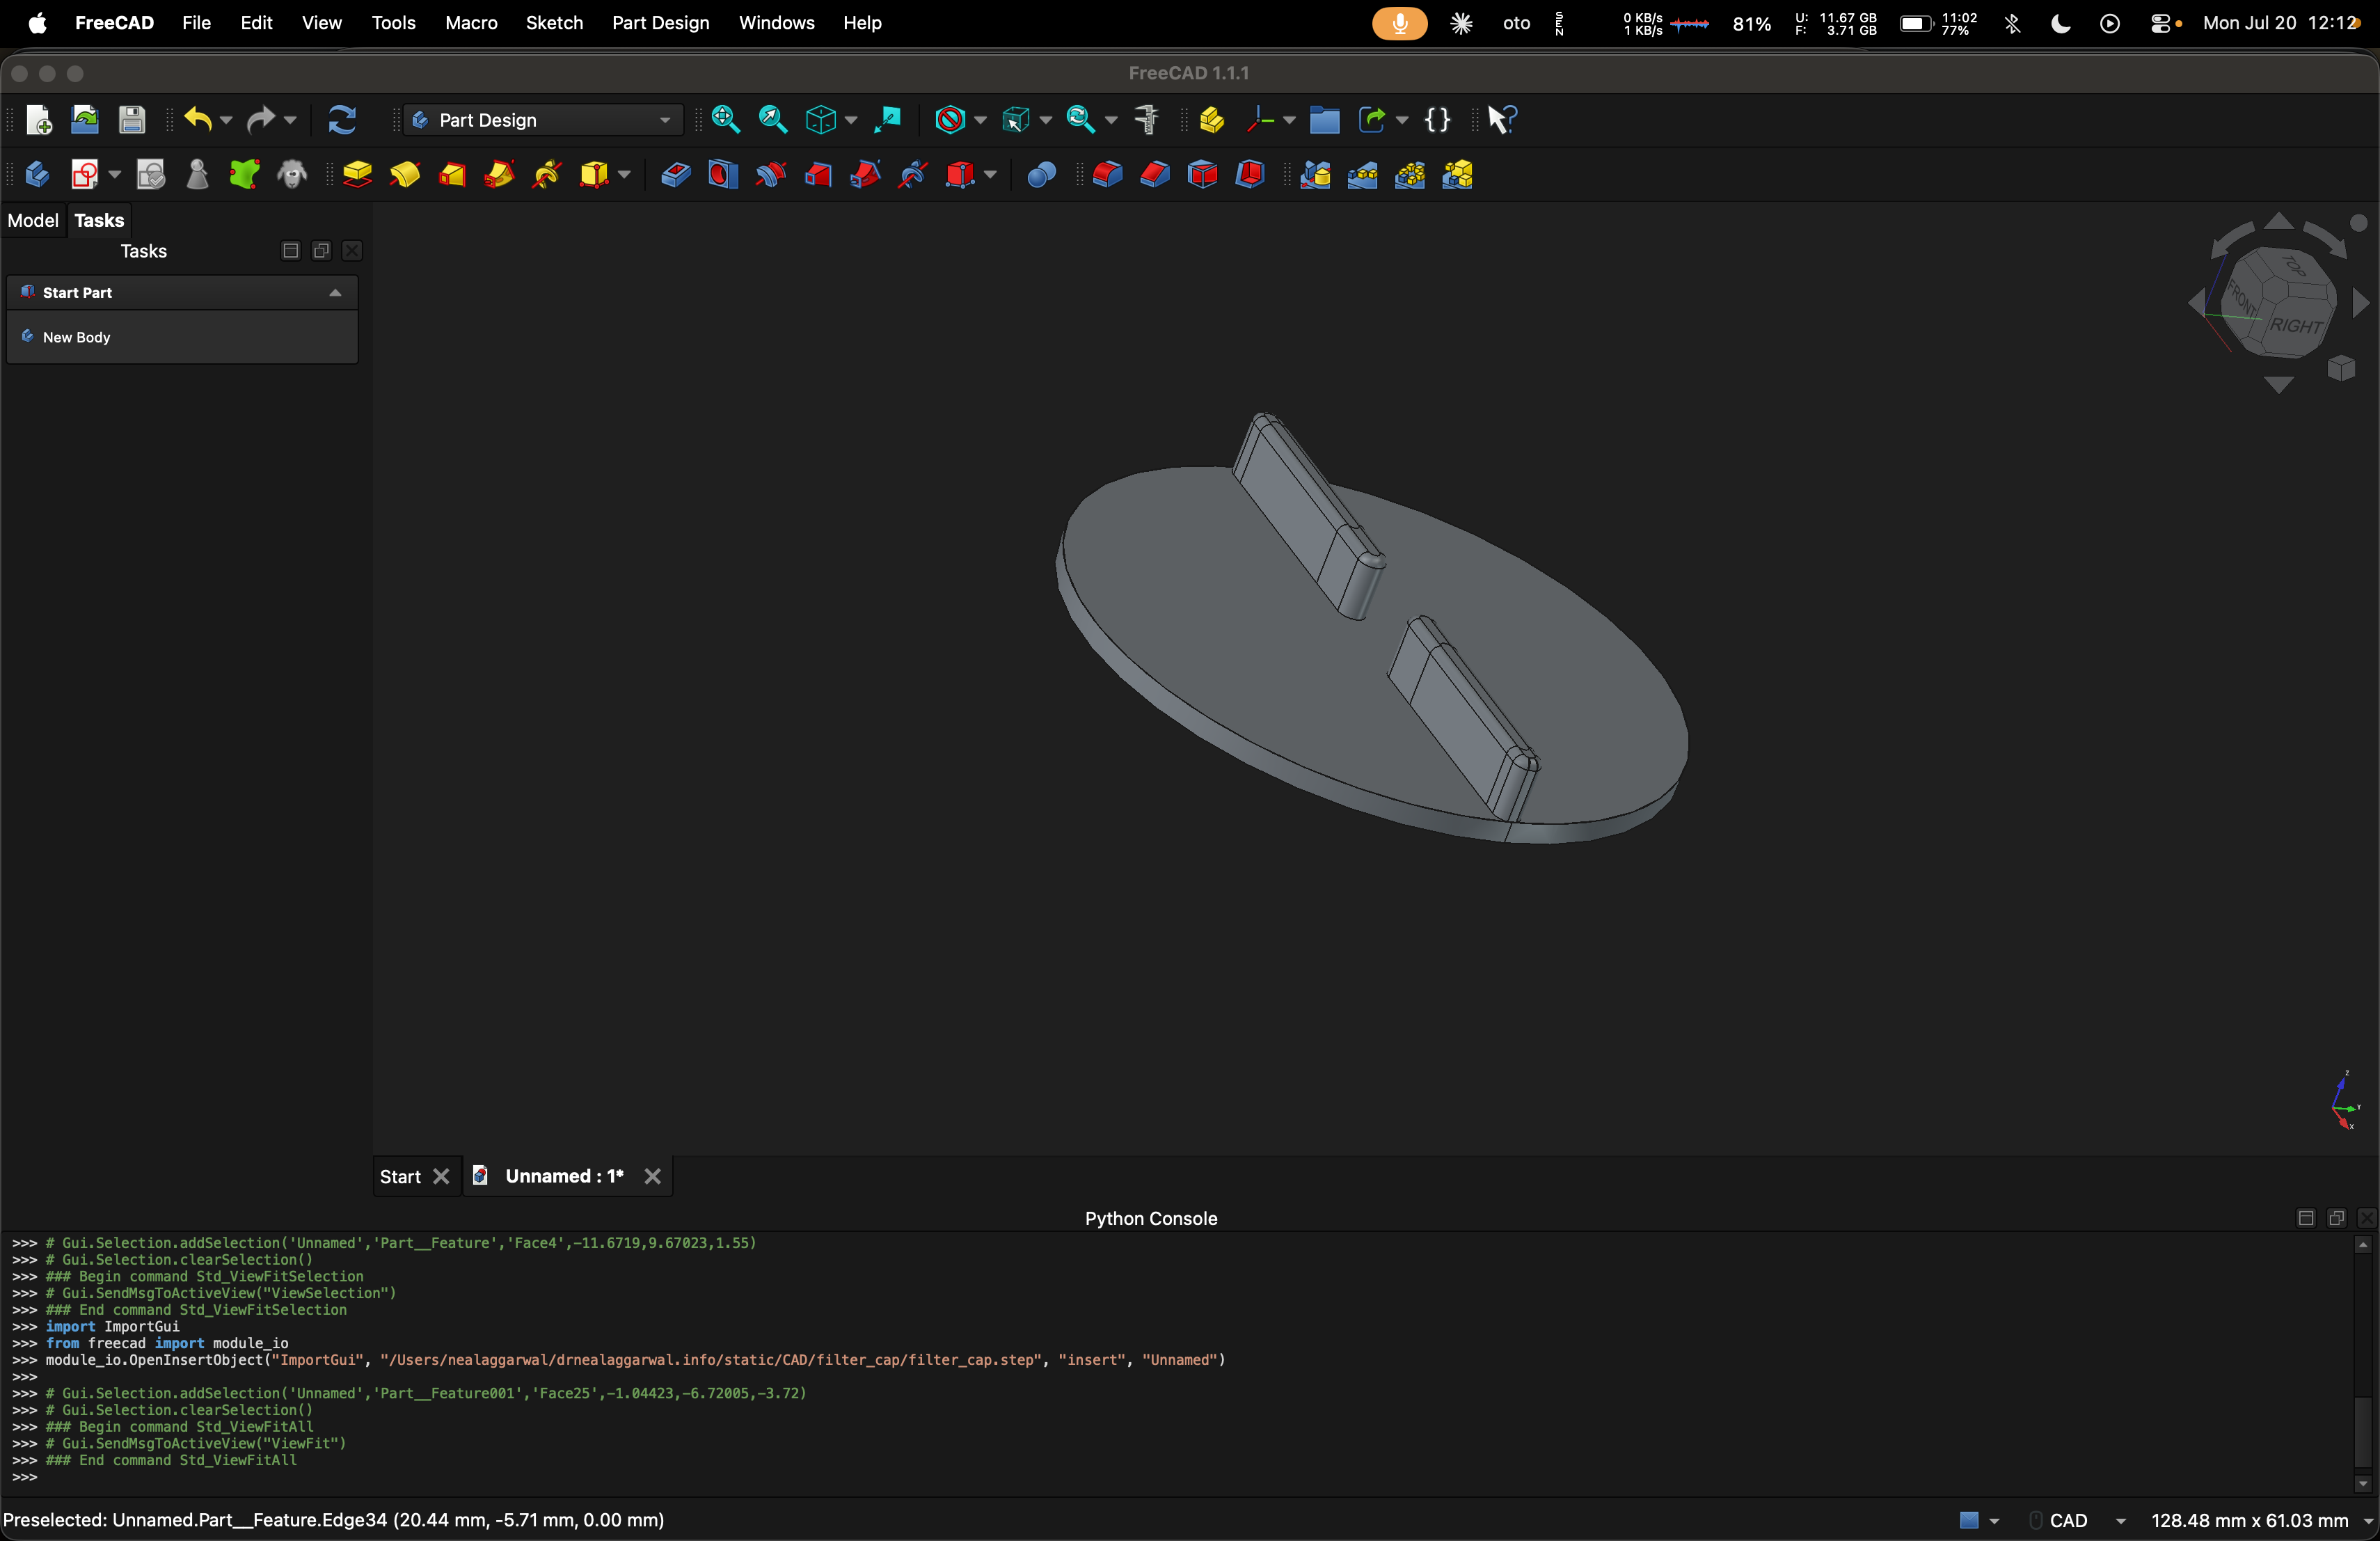
Running the code produces a clean, watertight solid model (a STEP file). I import that into FreeCAD — the free, open-source CAD package — to inspect the geometry from every angle and confirm it matches the original before anything is committed to plastic. The top view shows the two locating ribs on the disk; the underside shows the hub, the central bore, and the three equally-spaced bayonet lugs that lock the cap into its housing.
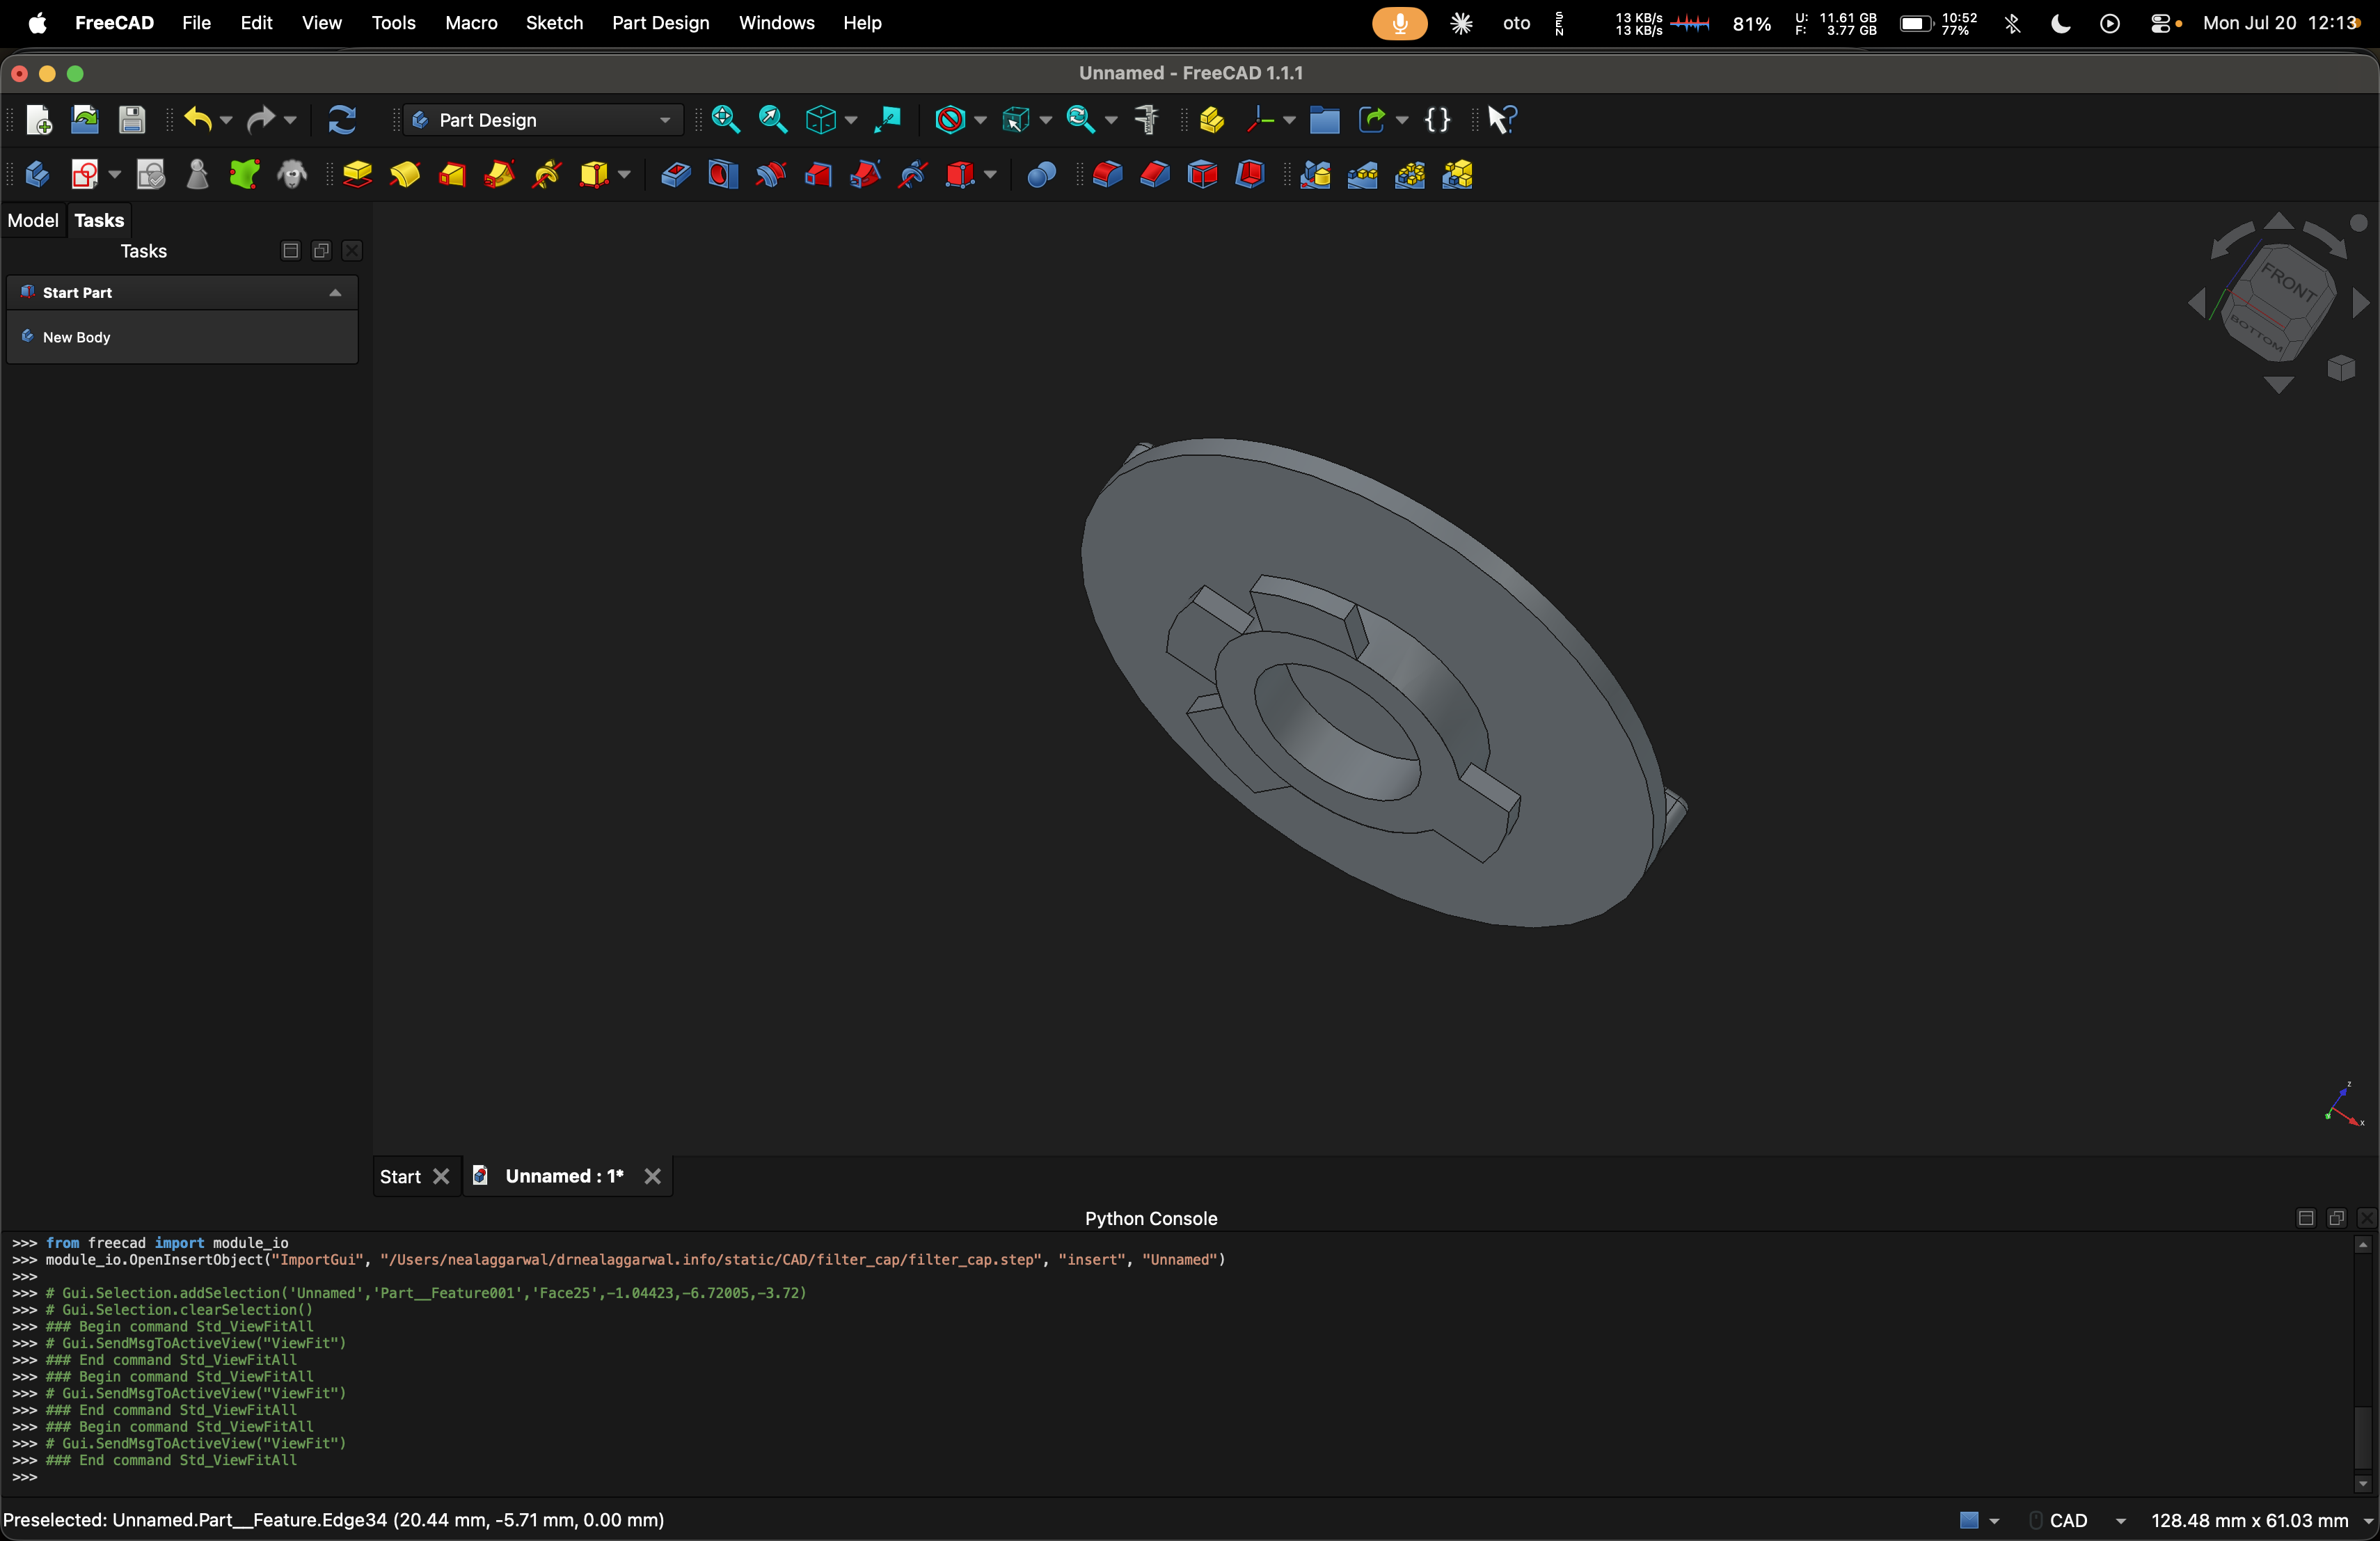
Once the model is verified, I export it as an STL — the triangulated mesh format every 3D printer understands.
Step 4 — Slice and print
The STL goes into a slicer (here, UltiMaker Cura), which converts the model into the layer-by-layer instructions the printer follows. For this cap I printed in PETG — a tough, chemically-resistant material well suited to a mechanical retainer — through a 0.8 mm nozzle at a 0.32 mm layer height. Material, wall thickness, and infill are chosen to match how the part is loaded in service.
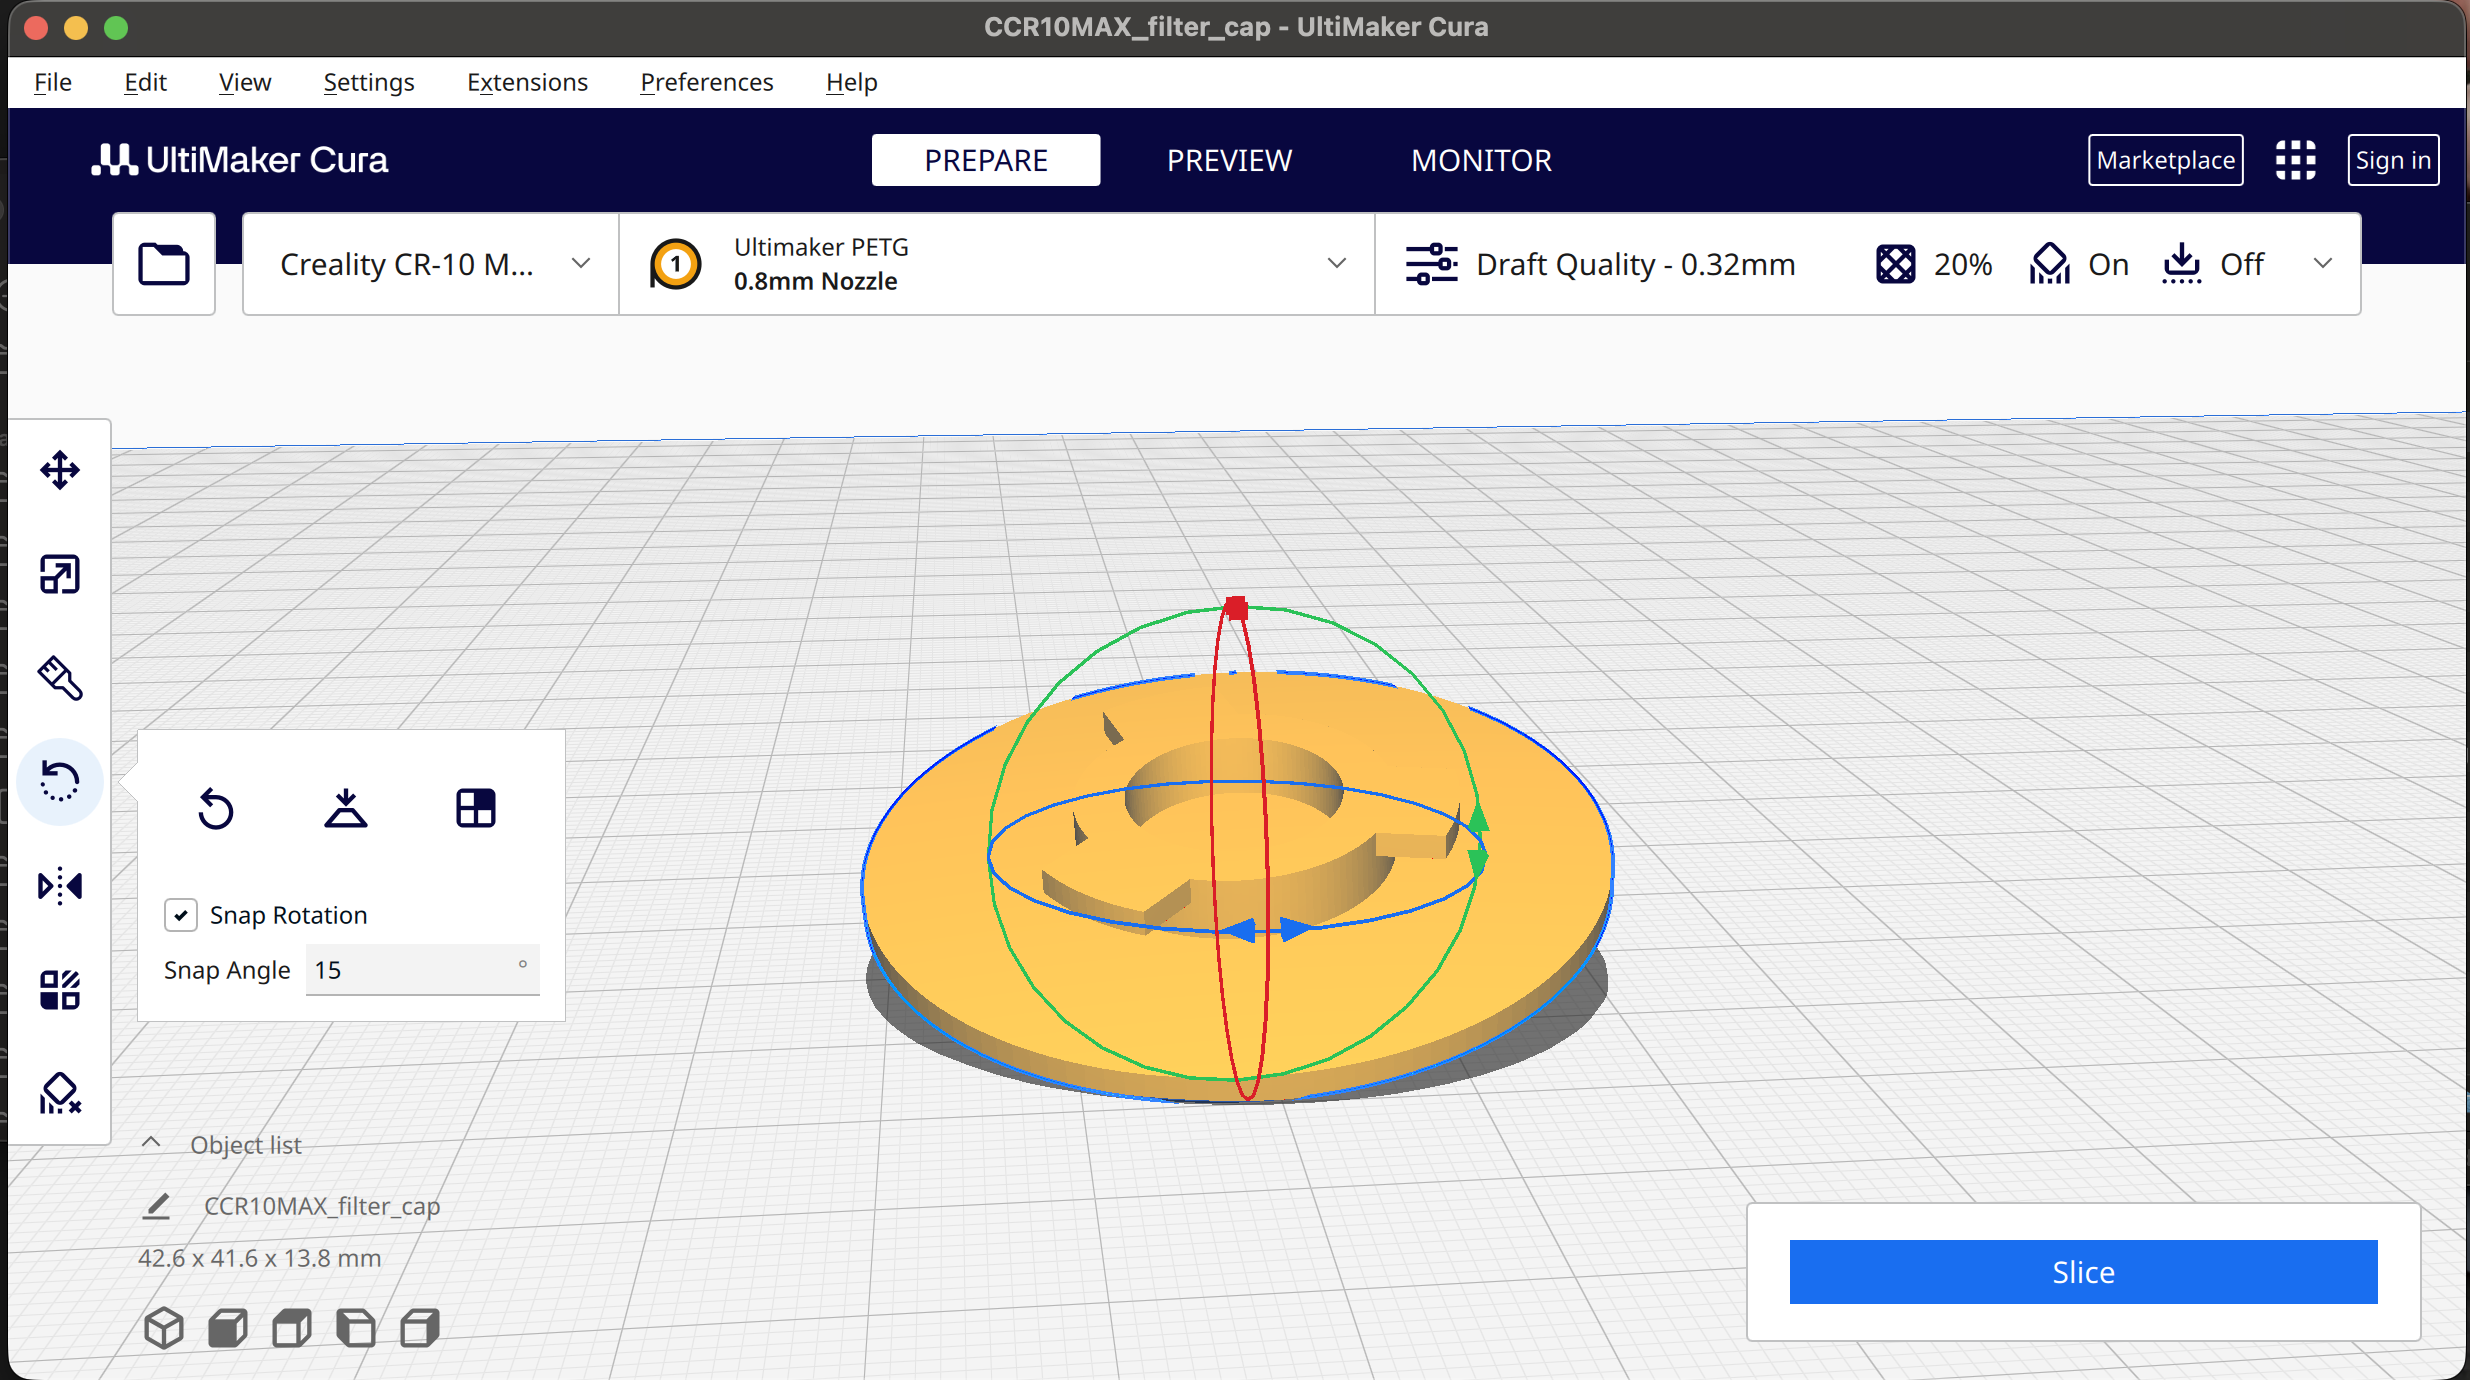
A short while later, the replacement is in hand (the yellow part at the top of this post): a faithful, functional copy of a component that could no longer be bought — and a machine returned to service.
Why this matters for medical institutions
The economics are stark. A machine worth tens of thousands can be retired by a component worth pennies to mould. Reverse engineering turns that dead end back into a repair:
- Downtime becomes days, not never. A discontinued part stops being a reason to decommission working equipment.
- The design is preserved as code. Once a part is captured parametrically, it can be reprinted on demand, adjusted, or scaled — indefinitely.
- It is sustainable. Keeping a sound machine alive avoids the cost and waste of replacing the whole unit for one failed part.
If a single part is holding your equipment hostage
If your institution has a machine sitting idle because one small component is no longer available, that is exactly the problem I solve. Send me the worn or broken part — or even a photograph and a few measurements to start — and I will tell you whether it can be reverse-engineered and reprinted.
A discontinued part should not be the end of a good machine.
— Neal